How to Make Recycled Newspaper Pots
It’s that time of year. Yep, transplanting time. But what’s a girl to do when she has more seedlings to transplant than she has pots to put them in?
Recycle all those old newspapers that are stacked next to your favorite chair and make biodegradeable newspaper pots!
I love a good DIY project. And if it involves recycling…I’m all over it! You see, I’ve been in the habit of saving newspapers for a long time. I’ve used them as weed block in my gardens. I made a paper mache’ bowl a few years back. (Note to self: don’t leave a paper mache’ bowl next to the kitchen sink)
I have even attempted to make fire bricks for the fireplace…once. And once was enough since they didn’t turn out so well. But hey, when you have newspapers stacked to the ceiling, you’re willing to try anything!
Therefore, it’s time to try something new…again. I’m ashamed to admit that this idea should have occurred to me several gardening seasons ago. But as they say, better late than never!
Necessity is the mother of invention!
Every year, I start planting pepper seeds in January. By the time March rolls around, the plants are ready to be moved to the garden. Hopefully, in a couple of months, those peppers will become Gma’s Hot Sauce. (Insert shameless advertisement for Etsy shop here!)
However, every year I plant more seeds than the year before. It never fails that I run short of biodegradable pots for transplanting. Of course, this year was no exception.
But unlike previous years, I don’t plan to spend a fortune on pots from the garden center. This year I’m making my own recycled, biodegradable, newspaper pots!
The Supplies:
Newspapers
Paper tape (Paper tape is more biodegradeable than scotch tape)
Soup can (or item that gives you the size you want)
The Instructions:
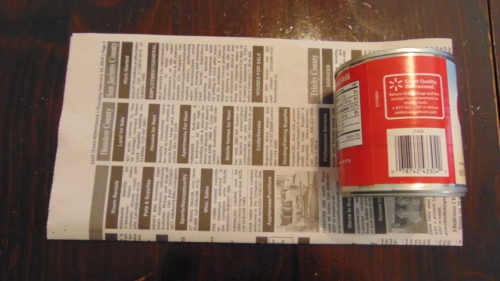
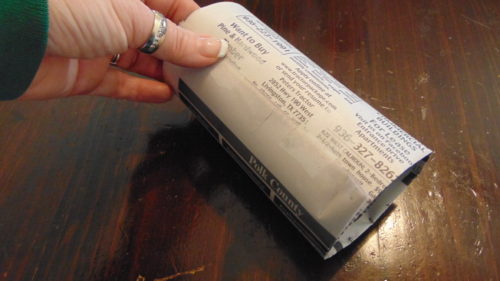
Step 1: Working with just one sheet of newspaper, fold in half so that several inches of paper extend past each end of the can. You may have to fold again if using a small can like the one I used. If you’re using a larger size can, you may have to experiment with folding until you get it the right size.
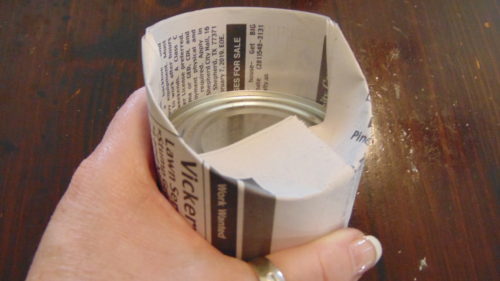
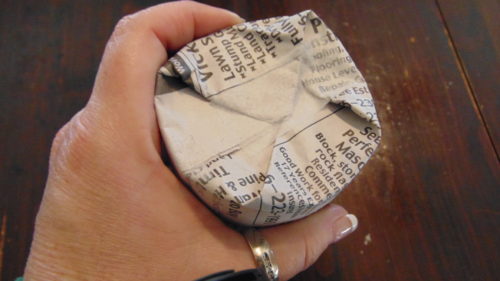
Step 2: Roll the newspaper around the can and secure with a couple pieces of tape. I used paper tape because it’s more earth friendly. Some people prefer to use stick glue. It’s all about personal preference and what you have on hand.
If you have to roll the paper around the can a couple of times, that’s okay. It’s best to use several layers of newspaper because it provides more stability when it gets wet. However, you don’t want to use so many layers that it takes several years to decompose. In all things, grasshopper, there must be balance!
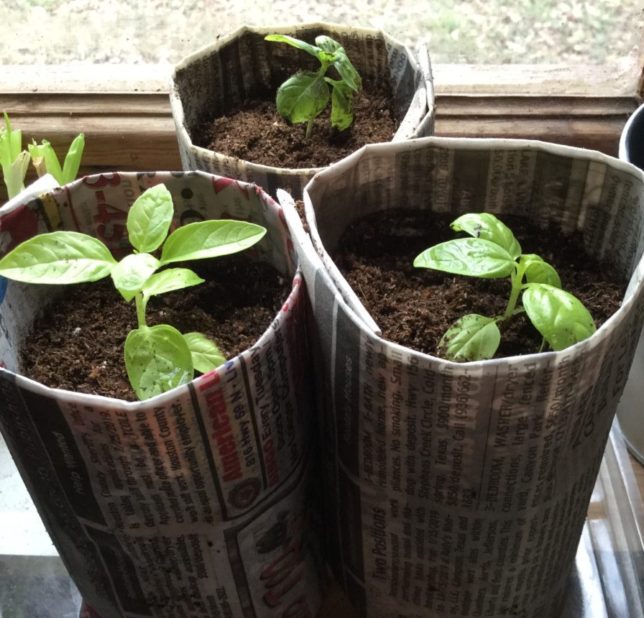
Voila’…newspaper pots. Basil is done…now to transplant a gazillion pepper plants! This is as simple as you can get. Although, I’ll admit I have seen some paper planters that origami fans might dream about. While they may look nice, I don’t see the need to get that fancy. It’s going into the ground where nobody will see it. Besides, when you have a gazillion pots to make, who has the time to get fancy!
Now, wasn’t that easy!
Not only did you save money, you recycled something that would have ended up in a landfill and made something with your own hands! And because this is so simple, you could let little hands help. It’s never too early to get kids interested in gardening. In my book, that’s a win all the way around!
Enjoy, my friends!
lisa
Subscribe
If you like what you see, click on the subscribe button so you don’t miss anything!
I promise not to spam you! By clicking the subscribe button, you agree to my privacy policy.


