Mug Rug in 30 Minutes
I like big mugs and I cannot lie!
And big mugs require something a little bigger than a standard coaster to rest on. Enter the mug rug! Now, I’m not exactly sure when the term “mug rug” came into being but I gotta admit, I kinda like it! So grab a cup of coffee and let’s talk about how to make a mug rug in 30 minutes… or less!
30-minute mug rugs are different from other kinds of coasters. For instance, I have coasters that look like giant bottle caps. They’re great for drinks that “sweat” because they catch all that moisture without damaging the furniture.
I also have a set of porcelain tile coasters…with roosters on them. (I have a thing for roosters and chickens in general). Tile coasters are good for really hot cups or bowls because, once again, they protect your surfaces from damage.
But mug rugs can fill both purposes. They catch moisture and provide a barrier to hot cups and bowls, thereby protecting your surfaces from damage.
The cool thing about mug rugs is that they’re so easy to make! If you’re using a sewing machine, you can sew up a whole set in about half an hour. Really!
The process of making mug rugs is shown using a sewing machine. But if you don’t own a machine and/or are handy with a needle and thread, the same process applies.
On a related note:
I’m a firm believer in teaching kids to be self-sufficient. I taught my oldest son to use a sewing machine, thread and needle when he was still young. I wanted him to be able to repair his ripped jeans or replace a button without relying on me (or someone else) to do it. After all, he wouldn’t be living under my roof forever and he needed to know how to do these things for himself.
I had that same mindset when my daughter came along. As a result, she was able to make her first quilt when she was in elementary school. She was proud as a peacock to show it off to our local quilt guild. I believe acquiring these skills early in life gives them a sense of independence and a morale boost. They’re more confident, knowing they can do certain things for themselves.
So when I say this project would be appropriate for smaller hands, it’s very do-able!. Start them off right by showing them how to cut fabric safely. My kids also learned the difference between my good fabric scissors and scissors that could be used for cutting everything else!
Show them how to thread a needle, make a knot and sew a simple, straight stitch or running stitch. These are skills that won’t be wasted when they get older.
30-minute mug rugs is a really good place to start teaching them the basics of sewing. It’s a quick project which means they won’t get bored before it’s completed. From there, it’s easy to graduate to making a stuffed pillow…or even a quilt!
What you need:
Fabric – panels are good and don’t require measuring, but use what you like. You will also need fabric for the back of the mug rug. Use plain muslin or a matching/coordinating fabric.
Batting – I use scraps from previous projects
Sewing machine or needle and thread
Scissors
A note about batting:
I use a low loft, 80/20 batting. Low loft means it’s not thick and fluffy. And 80/20 means it’s 80% cotton and 20% polyester. It’s easy to sew and won’t bunch up or pull apart when you wash it.
If you’re anything like me, you tend to save bits and pieces of batting to use in smaller projects like this. No need to go out and buy a roll of batting when all you need are a few squares.
If you don’t have any batting, ask someone you know who makes quilts. Quilters are a unique group and they’re very happy to help out when someone wants to learn the art. So don’t be afraid to ask. You might just find a sewing mentor in the process!
This post may contain affiliate links. That means when you click through and make a purchase using the links provided, I earn a small commission at no cost to you. As an Amazon Affiliate, I will never recommend a product I don’t use or trust myself.
The Process:
Step One:
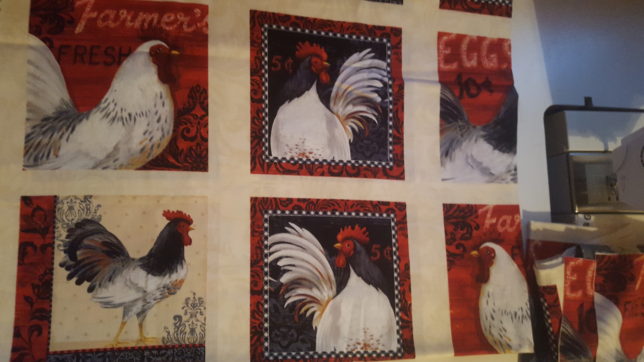
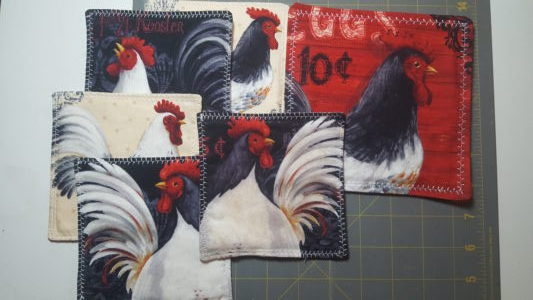
Decide how many mug rugs you want to make and cut out the required amount of squares. I like roosters so I used the fabric panel you see below. I cut out six squares following the outline of each square. Each square measured about 6 inches. Your squares may be bigger or smaller depending on the size of your panel. These will be your focus fabric.
If you’re not using a fabric panel, simply measure and cut your squares to the desired size. Remember to allow for seams by making the squares 1/4 inch bigger than you need.
Step Two:
Cut out batting and backing fabric to match your focus fabric size. I used both the red fabric and plain muslin for the backs. There are no rules against mixing up your fabric choices. So have fun with it!
Step Three:
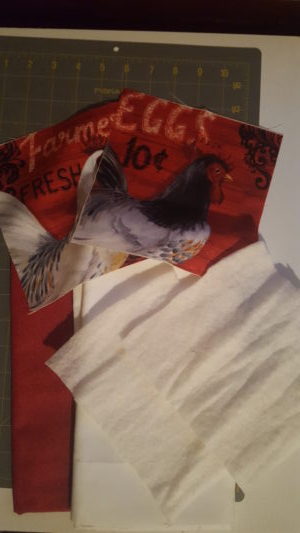
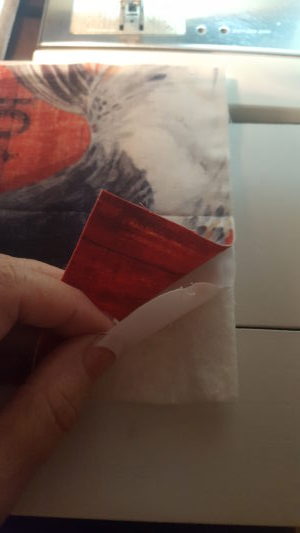
Stack the pieces: batting on the bottom, backing fabric goes in the middle and your focus fabric on top.
IMPORTANT: Make sure your backing is right side up and your focus fabric is right side down. They need to be facing each other. This is so that when you turn everything right side out, the batting will be in the middle. It will make sense in a minute…trust me on this!
Step Four:
Start sewing at the bottom of the square, in the middle. Sew all the layers together about 1/4 inch from the edge. Sew all around the outer edge, stopping about two inches from where you started.
Leaving the bottom open will allow you to turn the inside out. Make sure you add a few extra stitches on each side of the opening to avoid it ripping open when you turn it out.
Step five:
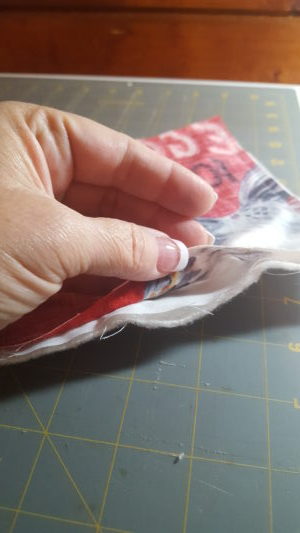
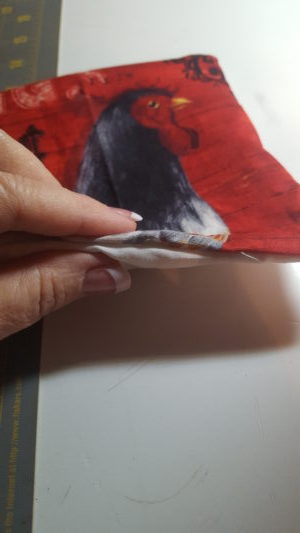
Turn the square inside out so the focus fabric is now right side out. Use the eraser end of a pencil to push the corners out. The part that was not sewn should fold inward by itself. Finger press this part of the seam so it lays flat. Simply use your fingers to press the fabric until it stays in place.
Step six:
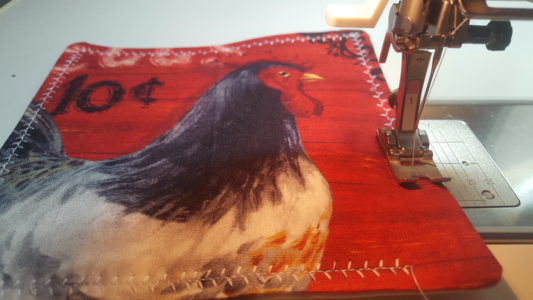
Using a sewing machine, sew a decorative stitch around the outer edge of the entire square, making sure to close the bottom seam completely. This can also be done by hand using an easy running stitch or the classic blanket stitch.
And you’re done! Wasn’t that easy! I made several in larger sizes because I have some large mugs. But really, you can make them any size you want.
And if they get dirty, just throw them in the wash. Depending on your fabric, you may have to iron them after washing. You can avoid ironing if you lay them flat to dry.
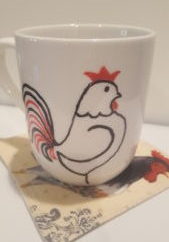
I told you I have a thing for roosters…isn’t my sharpie mug adorable! You can learn to make your own sharpie mug here. Both the mug rugs and the sharpie mug would be good projects for smaller hands. A set of mug rugs and a sharpie mug (that is personally designed by little hands) would make a nice gift set for a special coffee or tea drinker. Add your own special blend of tea, a big bow and they’re ready for gifting. This is a quick, fun project! So don’t be afraid to get the kids involved. You never know when you’ll have a budding quilter or sewist on your hands! If you give it a try, please let me know how it turned out. Just leave a comment below…I’d love to hear about it!
Until next time,
lisa
[/vc_column_text][/vc_column][/vc_row]
If you like what you see, click on the subscribe button so you don’t miss anything!
I promise not to spam you! By clicking the subscribe button, you agree to my privacy policy.


