How to Make a Sharpie Mug
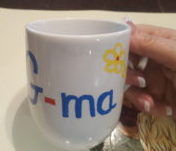
Sharpie mugs are original works of art…kinda like our children and grandchildren! Each child is an original and not like any other person in the family. And that’s what makes being a family so exciting…at times!
We’re a blended family and I’ll be the first to admit that being a stepmother isn’t easy. Heck, even being a step-grandmother has it’s challenges! But we’re fortunate that in this day and age, when families live great distances from each other, ours is only an hour or two down the road.
We recently took two of our granddaughters for the weekend. The oldest at 10 years of age, is happy playing quietly or reading on her iPad. The younger, who is 7, needs constant interaction! She doesn’t sit quietly to watch a movie…she is always wanting to “make something”.
After exhausting my craft room supply of beads (and many stretchy bracelets later), both girls were ready to move on to something else.
Let’s make brownies!
Yeah…
An hour later, with happy bellies, they’re bored again!
When the girls visit, I try to share with them some skill that I learned as a young girl. In previous visits, I’ve taught them to knit, crochet and how to make a simple nine-patch quilt block. But this weekend, I was racking my brain for something new.
Sharpie mugs to the rescue!
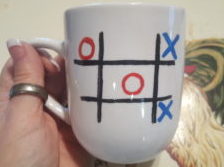
Sharpie mugs are the “in” thing right now! Not only are they fun and easy to create, but practical as well. The sky is the limit when it comes to decorating a sharpie mug. And it’s something the kids can do to show their creativity and personality.
A word about Sharpie Pens:
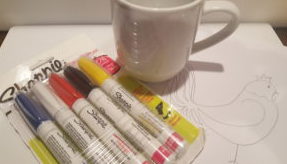
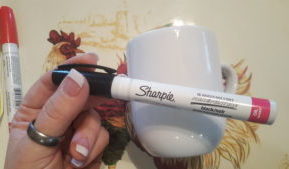
I used oil-based sharpies for my mugs. However, I’ve heard that plain sharpies will work just as well. Apparently, oil-based ink will bubble up or separate if not allowed to dry properly. To be honest, I have not experienced this problem. Also, I understand it helps to let the mug sit for 24 hours after applying the design and before putting it in the oven to “cure”.
In case you’re wondering, “curing” is just another word for baking. It helps to set the design and make it more permanent.
Either type of sharpie will work. So, really it’s up to personal preference and how much time you want to devote to the drying process.
A word about functionality:
First and foremost, when applying a design to the mug, keep in mind whether it will be used for drinking or for other purposes. Due to some concern regarding transfer of ink from cup to mouth, avoid placing any design on or close to the rim of the cup, where the mouth might touch.
To be honest, I found no evidence to support that concern. Sharpie ink dries pretty quick so a transfer of ink shouldn’t be an issue. But if you’re worried, just keep the rim of the cup free from ink.
I like to keep it simple!
Because my designs have been pretty simple, worrying about design transfer has not been an issue for me. However, if you want to use an all-over design, you can cover the design with a couple layers of Mod Podge. This will seal the design and put a barrier between the ink and the mouth. Additionally, you can choose between a gloss or satin finish.
What you need:
Mug/s – plain, white ceramic mugs can be acquired at the dollar store without breaking the bank.
Sharpie Pens – Make sure your package includes all the colors you want to use in your design.
Acetone or Nail Polish Remover
Old rags or paper towels
Q-tips (for detailed cleaning work)
Picture or drawing of intended design for inspiration (optional)
Mod Podge (optional)
This post contains affiliate links. That means when you click through and make a purchase using the links provided, I earn a small commission at no cost to you. As an Amazon Affiliate, I will never recommend a product I don’t use or trust myself.
The Process:
Step One:
First, remove any dirt and debris by washing and drying the mug thoroughly. If the surface of the mug is oily or greasy, the ink may not adhere. Additionally, you can wipe the cup with rubbing alcohol to ensure no oil or grease interferes with your design. However, this is strictly optional.
Step Two:
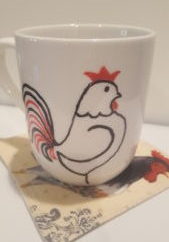
Next, apply your design. You can use stencils or do it free-handed, which is what I did with my Rooster design. If you make a mistake or don’t like the results, use the Acetone or Nail Polish Remover and a clean rag to wipe away the design. Q-tips work great at cleaning up small details.
Remember…
The design is not permanent until it comes out of the oven. Thankfully, there is plenty of opportunity to get it right. This is especially helpful if the kids make a mistake or don’t like what they created.
Step Three:
Third, once the design is completed, allow the mug to sit for 24 hours. This ensures the design will cure correctly, without bubbling or separating. If you created an all-over design, make sure you apply a few layers of Mod Podge before placing in the oven. Allow the Mod Podge to dry overnight before curing.
Step Four:
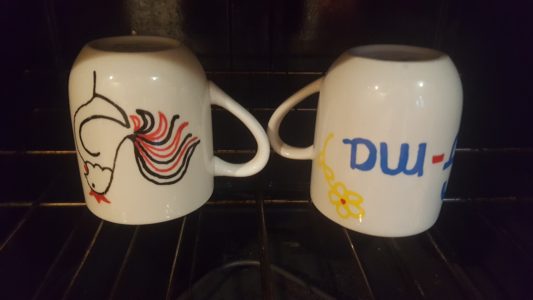
Finally, place the mugs on a middle rack in a cold oven, upside down.
DO NOT PREHEAT…this could cause the mug to break.
Set the oven temp to 300 degrees and allow the mugs to heat gradually. They should cure at 300 degrees for about 30 minutes. Turn the oven off and allow the mugs to cool inside the oven before removing.
That’s it…you’ve just created a one-of-a-kind mug. I’ll bet its a masterpiece![/vc_column_text]
Finally, your mug is now ready to be used and enjoyed. If you applied a few layers of Mod Podge prior to curing in the oven, your mug should be dishwasher safe. However, if you want the design to be bright and beautiful for years to come, play it safe and hand wash.
Get the kids involved!
This would make an excellent project for small hands. Imagine the smiles when someone special receives a mug that was decorated just for them.
I love my rooster mug! Oh, and if you want to make a mug rug like the one above, it too would make a nice gift to include with the mug. Add a special blend of tea, a bow and it’s ready for gifting.
Have you made a sharpie mug for yourself or someone else? Do you have a few tips to add or have found a better/easier process? I’d love to hear about it! Share your thoughts by leaving a comment below.
Until next time,
lisa
If you like what you see, click on the subscribe button so you don’t miss anything!
I promise not to spam you! By clicking the subscribe button, you agree to my privacy policy.


