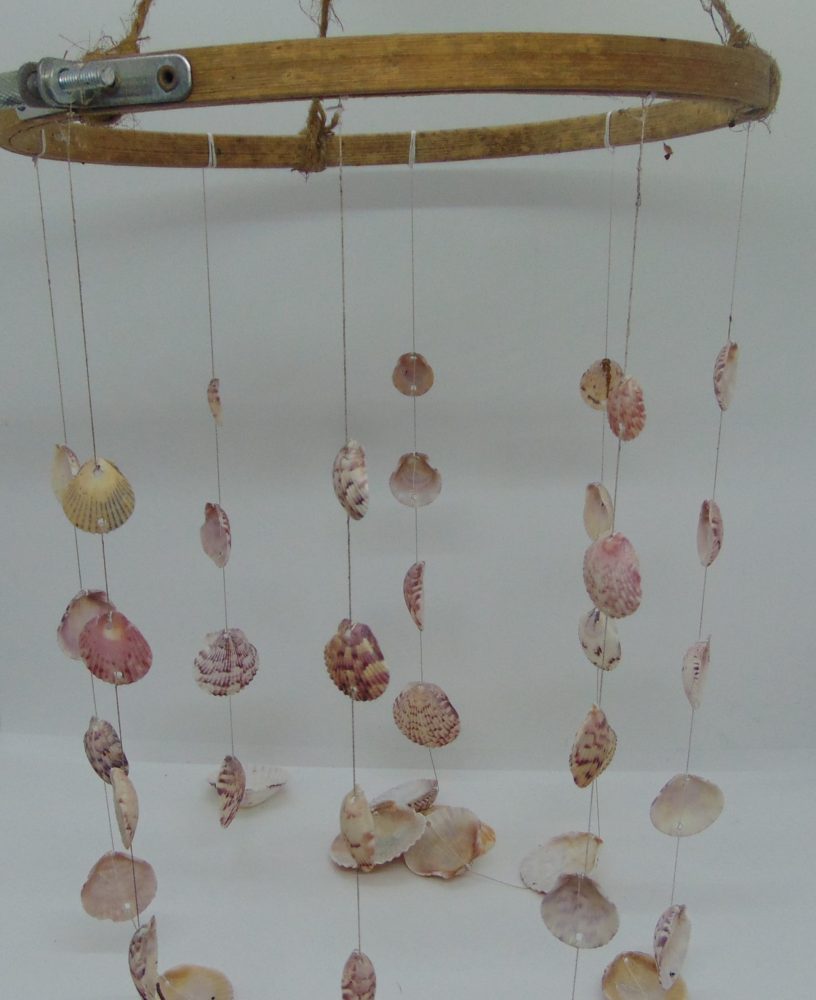
Make An Easy Seashell Wind Chime
I’ve always wanted a seashell wind chime. And one of my favorite things to do at the beach is to hunt for the seashells to make one. I actually call it “treasure hunting”. You never know what you might find!
I don’t know what it is about hunting for shells that is so addicting. But I think I might need an intervention. I have loads of shells, coral and sand dollars that I have collected over the years. I may never be able to use them all!
Please tell me I’m not the only one! You understand…right?
The reason I have collected so many is because I wanted a large selection to choose from. Thus, it allowed me to make an easy seashell wind chime that looked cohesive and not thrown together.
I love the sound that different chimes can make when they’re being stirred by the wind. It’s almost like having your own personal orchestra playing. And they’re so soothing to listen to. Finally, I’m creating the easy seashell wind chime that I’ve always wanted. Plus, this project is simple enough that even the kids can help with it.
In case you missed it, you can check out my last seashell project…earrings and a matching necklace.
What I love about the seashell wind chime is that it’s practically no cost to make. If you’ve collected shells for years like I have, there won’t be any need to buy them from a craft store.
If you don’t have an embroidery hoop in your craft stash, they’re only $1.49 at the big box store. I’m betting you already have everything else you need to complete this project.
This post contains affiliate links. That means when you click through and make a purchase using the links provided, I earn a small commission at no cost to you. As an Amazon Affiliate, I will never recommend a product I don’t use or trust myself.
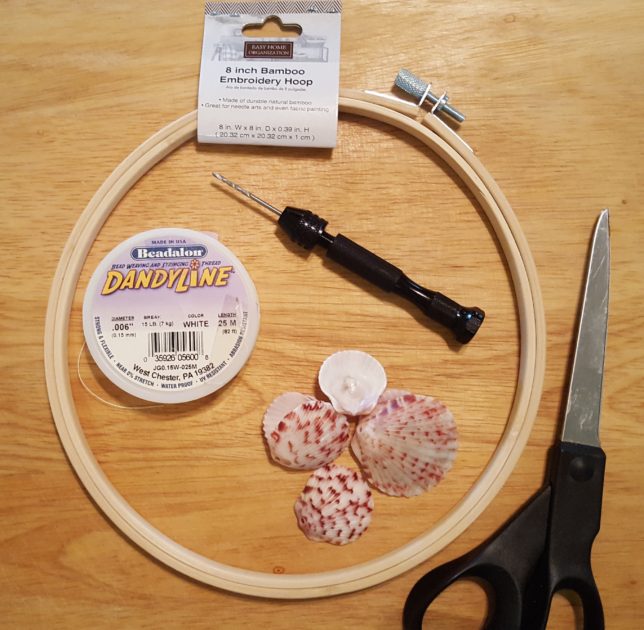
You will need:
Embroidery hoop (I used an 8 inch wooden hoop)
String
Shells
Scissors
Power Drill or Pin Vise Hand Drill
NOTE: I used beading thread because it’s what I had on hand. You could also use crochet thread or even fishing line! Additionally, the size of the hoop is up to you. Just keep in mind, the larger the hoop, the more strings (and shells) you’ll need.
Before you start
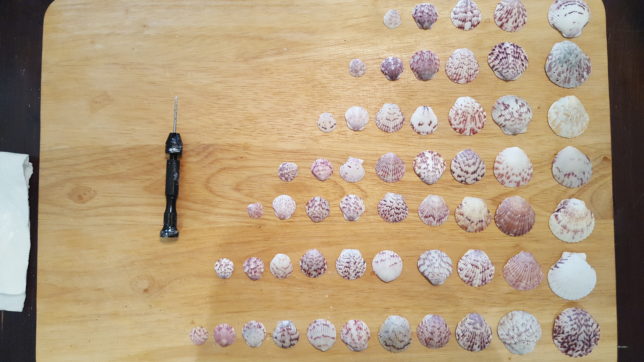
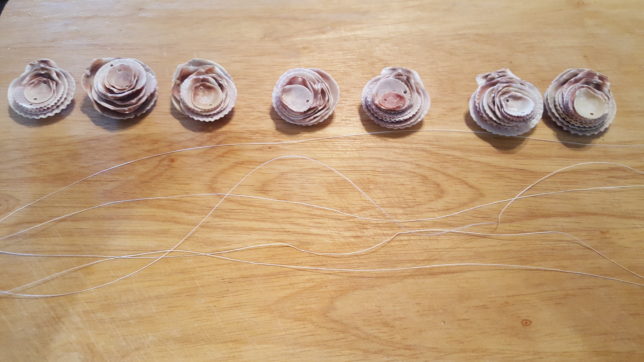
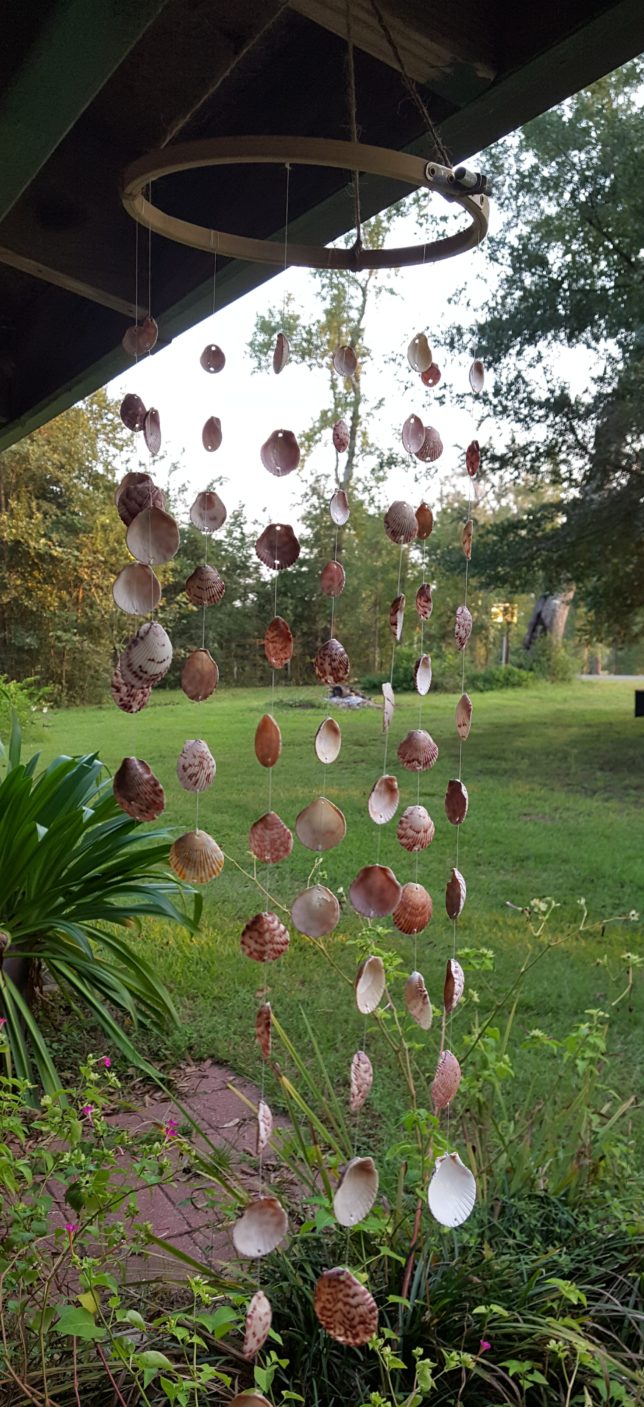
First, have an idea of how you want the finished wind chime to look. It helps to lay out the shells in the order you want them to hang. Looking at the photo below, you’ll see that I wanted my chime to have a tapered effect.
If you like, you can make all of your strings the same length. Also, you could use more or less shells or a variety of different shells. It’s totally up to you!
However, I suggest you put your largest shells at the bottom of the string. This gives it more weight and helps the strings move nicely when the wind blows.
Next, drill holes in all the shells you intend to use. With the exception of the largest shell, drill holes in the top and bottom of each shell. Not sure how to drill shells? Check out my instructions here.
Once holes are drilled, cut your strings according to the number you want to hang. I had 8 strings and each string was roughly 48 inches long. You’ll want to make sure you have plenty for all the shells you’ll be attaching.
First Shell:
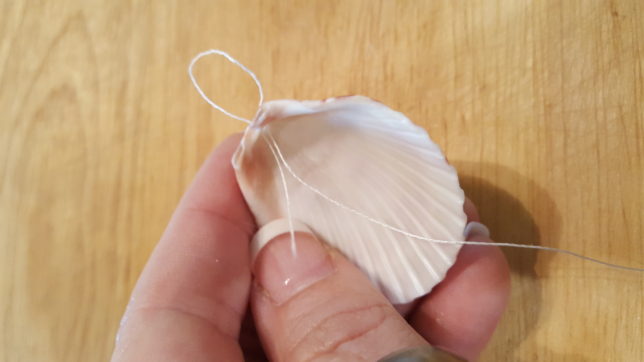
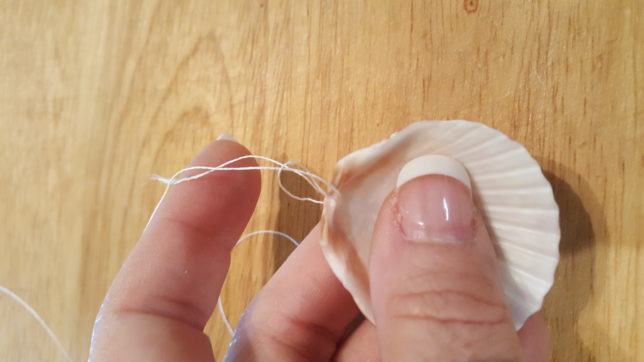
Take one end of the string and fold it to make a loop.
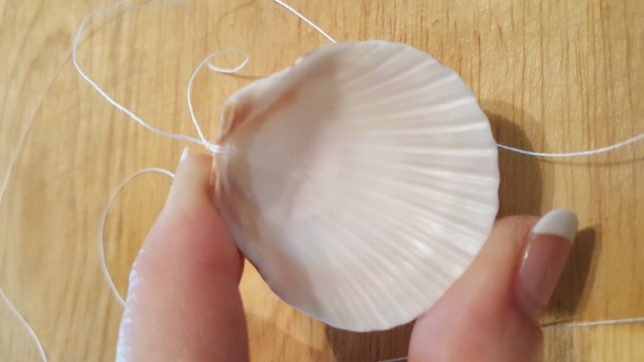
Push the loop through the top hole of the largest shell and pull the ends through snugly.
Add a couple of simple knots to secure and cut the short end of the string.
Adding shells
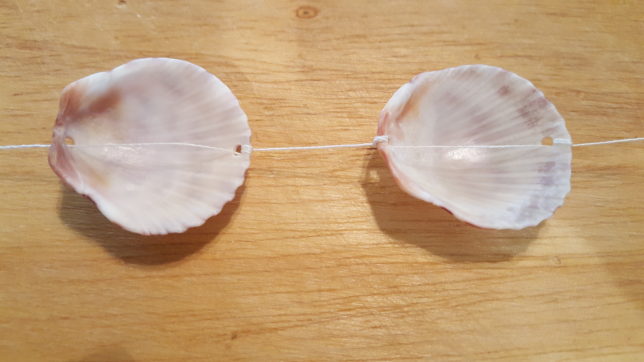
Take the free end of the string and run it through the bottom hole of the next shell. Push it in from the front of the shell and pull it out the back of the shell. Wrap the string around to the front and pull it through the hole twice more.
This will keep the shell from sliding down the string . Also, it saves you from having to cut and tie a dozen knots!
Next, run the string through the top hole in the shell, wrapping it twice more to secure. Repeat this process until all the shells are strung. Stack each string in the order they are to be hung. However, you can skip this step if all the strings are the same length.
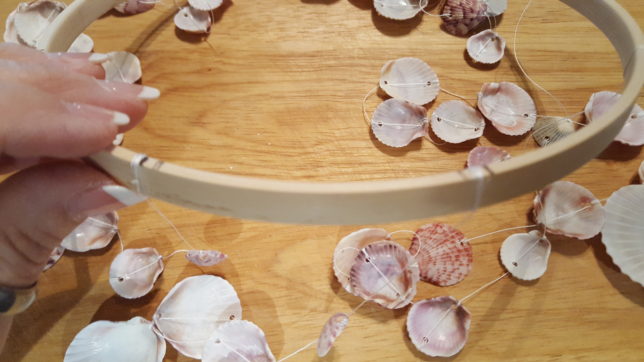
Next, you’ll use a pen to mark on the smaller, inner hoop ring where each string will be tied. For balance, you’ll want to space the strings evenly so make your marks accordingly.
Add your strings
Using the marks on the hoop, add your strings in the order you want. Simply wrap the extra length of string around the hoop several times and secure with a couple of simple knots.
This is optional, but I added the adjustable outer ring (the one with the screw on it) as additional security to keep the strings in place. Additionally, you could also use the outer ring to make a second wind chime.
Once all the strings are attached, you will attach three more strings spaced evenly to form a triangle. Here, I used twine because I felt the weight of all those shells needed something stronger. Gather these three strings and make a knot at the end by which the chime can be hung.
Have fun with it!
Hang your chime where it will be sure to receive a nice breeze. Then just sit back and admire your crafty work…you deserve it!
I’m always looking for more ways to use seashells. Do you have a favorite project? If so, I’d love to hear about it! Feel free to leave a comment below. Finally, if you know someone who is addicted to seashells like I am, show them some love and share this post with them![/vc_column_text]
Until next time,
lisa
If you like what you see, click on the subscribe button so you don’t miss anything!
I promise not to spam you! By clicking the subscribe button, you agree to my privacy policy.


