Chicken Treats
Chickens feel the heat just as much as us humans do. Probably more so. Help them deal with the heat by making some simple frozen treats.
Some people call these “corn pucks”. And they’d be absolutely right! Corn pucks are just what they sound like…frozen pucks of corn. And they can certainly do some damage when aimed at someone’s head! Not that I would encourage such an action. Just sayin’.
Anyway, I like to call them “Chicken Chillers”. I think that name sounds way more cool (pun intended) than corn pucks, don’t you?
Cool name aside, these chicken treats are quite healthy and they give the birds a break from their everyday fare. Because they’re frozen, this simple treat can help keep them cool on a hot day.
Best of all, you can make them without putting a big dent in your budget!
Do you enjoy a snow cone or ice cream on a hot day?
Chickens are no different!
You may ask why they don’t just go for a dip in the pool. Well, because chickens weren’t created to be swimmers. When God was creating a bird that could swim, the chicken was holding the door for the duck to walk through!
Okay, I’ll be serious. It’s a valid question after all.
First, chickens don’t have webbed feet for paddling. Ducks got that gift.
Second, chicken feathers are not waterproof. So, when they get wet, they get water logged. The weight of the wet feathers is sufficient enough to pull the bird down in the water. Eventually, the poor thing will drown. It would be similar to you wearing a heavy fur coat while you’re swimming.
Finally, they can’t right themselves when they go upside down in the water. Again, ducks got all the luck.
So…
A nice, cool dip in the pool generally isn’t an option. Unless you’re talking about a kiddie pool with only a couple inches of water. Also, assuming the birds are inclined to get wet to begin with….which most are not.
But I digress.
Chicken Chillers are easy to make and take no time at all. The longest part is waiting for them to freeze. I recommend picking up four or six ears when you can get them for a buck or less. They don’t even have to be of good quality! Chances are you might pay less if the ears are less than perfect.
Four or six ears doesn’t sound like much. But they’ll go a long way, depending on how often you serve chicken treats to your flock.
Lisa’sSimpleLife is a participant in the Amazon Services LLC Associates Program, an affiliate advertising program designed to provide a means for sites to earn advertising fees by advertising and linking to Amazon.com. For more information, please read my Privacy Policy Most people know how to remove the corn husks so I won’t go into details. However, I personally like to cut the fat end off the cob and peel the husk and silk toward the narrow end. It’s my humble opinion, but I think this way of shucking makes removing the silk easier..
Once the ears are shucked, it’s time to cut the corn off the cob.
Here is my public service announcement about gadgets designed to make cutting corn off the cob easier: don’t fall for them! I’ve tried several that never worked any better than a good, sharp knife.
And a good knife is generally cheaper than some of these gadgets!
Nor did the fancy gadgets make less of a mess.
And this is where I insert the warning:
YOU WILL MAKE A MESS!
It’s inevitable. Just accept it and throw down a towel or large plastic sheet before cutting. Goggles and an apron might come in handy too!
You will need:
4 ears of corn, shucked
Large bowl or baking sheet
Paring knife or butcher knife
Silicone muffin cups or flexible mold
Water
Apron and goggles (optional)
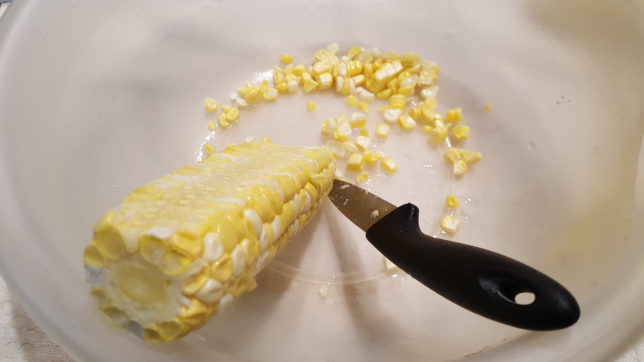
Start by carefully cutting the corn away from the cob.
There are two ways you can do this:
- Using a paring knife, start at the small end and cut toward the big end, making sure the kernels land inside the bowl.
- Stand the cob on end in the middle of the baking sheet. Using the butcher knife, cut downward from the small end, making sure the kernels land on the baking sheet.
Whichever method you use, you’ll want to get a good portion of the kernel without cutting too deep into the cob. After the first couple of cuts, you’ll see what I mean about messy. Just do the best you can but please, do it safely!
Once the corn is cut, give it a quick rinse.
Do this by adding water to the bowl, swirling the corn around and pouring it into a strainer to drain. This step isn’t absolutely necessary but it does provide an extra layer of cleanliness just in case you were less than diligent about knife safety. Stuff happens…I get it!
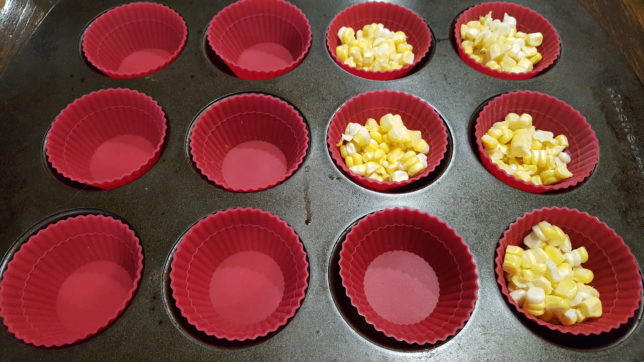
Next, divide the corn evenly between the silicone molds/muffin cups.

Add water to each cup until almost full.
It’s okay if some kernels are not completely covered. It will be a teaser of sorts for the birds and give them a target to aim for.
Place the molds/muffin cups in the freezer until frozen solid.
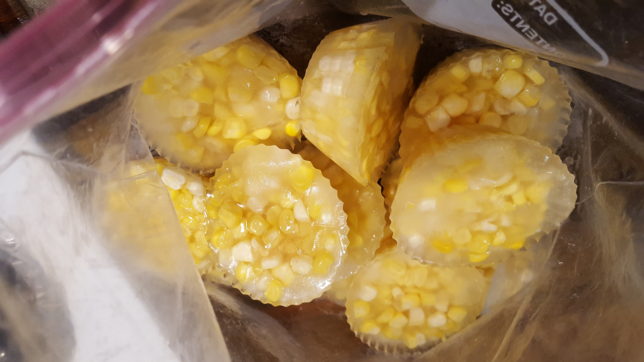
Once frozen, remove them from their silicone mold and place in a zip-top baggie. Hopefully you resisted the urge to chuck one across the room just to see what kind of damage it could cause. I’m impressed with your self-control!
Keep these chicken treats in the freezer and they should last at least six months. But to be honest, I’ve never been able to keep them past a couple of months. Texas can get wicked hot in the summer. So I give my chickens a “chiller” at least a couple of times a week.
 That’s a lot of chicken treats for not a lot of money!
That’s it…easy peasy! Make some “chicken chillers” for your chickens and they’ll love you forever! And if they don’t, you can at least sleep better knowing you helped them beat the heat and gave them a healthy snack to boot. Made with love and your own two hands!
If you make these chicken treats, I’d love to hear about it. Just drop me a line or two in the comments box below. Or, tell me what your favorite snack is to feed to your flock! Feedback is always welcome!
Enjoy!
lisa
Subscribe
If you like what you see, click on the subscribe button so you don’t miss anything!
I promise not to spam you! By clicking the subscribe button, you agree to my privacy policy.


