Care for Cutting Boards
Most people wouldn’t think of a cutting board as a tool. But it most definitely is! And like any tool, it must be maintained correctly if you want to keep using it.
I don’t know about you, but I’ve got better things to do than spend all day repairing stuff. So it makes sense to spend a few minutes on maintenance now in order to save hours of repair work later.
How many is too many?
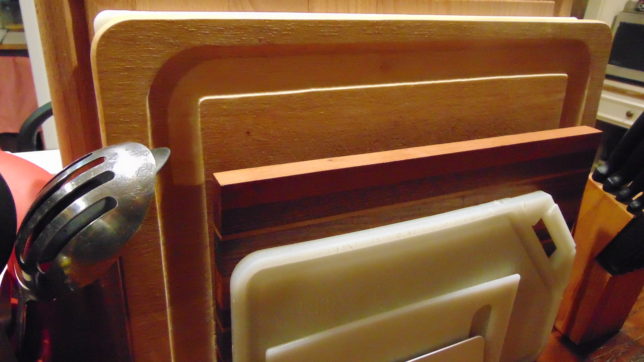
If you’re like me, you may have several cutting boards. And they all have a specific use, right?
Now, I’m not telling you to go out and buy more cutting boards. If you only have one or two, that’s fine. If that works for you and your budget, great! However, it is recommended that you have at least two. One to be used specifically for cutting meat and the second for cutting everything else. This helps to avoid cross contamination of food.
Nor am I going to tell you that wood boards are better than plastic or glass. They each have their good points. Those for team wood swear that their knives stay sharper longer. Team plastic love that they can pop their boards into a dishwasher. Almost no effort is required to clean them. Ultimately, the choice is up to you.
Maintenance is required whichever you choose!
Plastic – Care for plastic cutting boards is minimal. They can go into a dishwasher and come out undamaged. Unfortunately, plastic boards can also yellow with age. Similarly, knife marks are more noticeable. As a result, the board is no longer pretty.
A little salt and lemon can fix that! After washing your plastic board in hot, soapy water, sprinkle with some coarse salt (sea salt or kosher salt works good). Scrub the salt into the board using half of a fresh lemon. A good rinse in hot water and you’re done!
The lemon will brighten and disinfect the board. The salt removes any last particles of food left behind after washing. It may also make those knife marks less noticeable.
For tough stains, you can try bleaching your plastic board. Wash as previously suggested. Next, add one tablespoon of unscented bleach to a gallon of clean, hot water and let the board soak for a few minutes. Rinse again with hot water and dry completely before storing.
My research indicates that bleaching kills about 99% of the germs and bacteria that can cause food-borne illness. If your cutting board is heavily scarred, this should be done on a regular basis.
A little TLC goes a long way!
Wood – Unless your board is one solid piece, it will fall apart in the dishwasher. But it still needs to be cleaned after each use. And if you’ve just finished cutting meat or seafood, you definitely want to clean it before cutting other food.
NOTE: Never leave a wood cutting board sitting in water as this can cause the board to warp and crack. Make sure you clean up any moisture underneath the board and wipe up any liquids on top of the board right away.
If not properly maintained, wood cutting boards can acquire little cracks that hide decaying food particles. Yuck! Bacteria can grow quickly and before you know it, you have a good chance of getting sick. Nobody wants that. Trust me, it’s not pretty!
The best way to clean wood cutting boards is with baking soda and white vinegar. Because of the acidic nature of white vinegar, it can kill the bacteria that causes food poisoning and botulism. It’s also safer and gentler for the wood fibers than using standard soap and water. Simply sprinkle the board with baking soda and spray with white vinegar. Once the bubbling stops, give it a good scrub and rinse well.
Make a habit of giving your wood board some love.
Care for wood cutting boards is slightly different than for a plastic one. Once your board is clean and completely dry, give it some love with an application of Mineral Oil or food-grade Linseed Oil. Cover both sides and edges of the board with oil and wipe off any excess.
If this is a new board, let the oil sit for awhile before wiping up the excess. Prop it up so it gets air flow to both sides. Once the excess oil is removed, let it dry completely before storing.
The choice between Mineral Oil and Linseed Oil is a personal one. I prefer Mineral Oil because I can get it from my local drug store for about $4 a bottle. In my area, Linseed Oil is harder to come by. In the end, there isn’t much difference between the two.
This post contains affiliate links. That means when you click through and make a purchase using the links provided, I earn a small commission at no cost to you. As an Amazon Affiliate, I will never recommend a product I don’t use or trust myself.
What if your wood board has seen better days?
Does your wood board have cracks that would shame the San Andreas fault? For the sake of your health, you should get rid of any board that has deep gouges or large cracks. Severely damaged boards are hard to clean thoroughly. And don’t forget that they can hide those nasty things that cause food contamination and illness. Really, better safe than sorry!
However, if your board only has a few minor cracks, you may be able to save it. Follow the steps below and your wood cutting board should be looking like new!
You will need:
A plastic sheet, drop cloth or large trash bag
Titebond III Ultimate Wood Glue (food-safe glue)
A scraper (to remove excess glue)
Tape
Mineral oil or cutting board oil
The Process:
Step 1 – Protect the work surface with a plastic sheet or large trash bag.
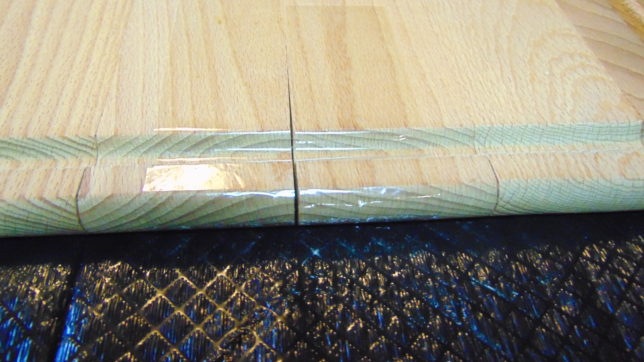
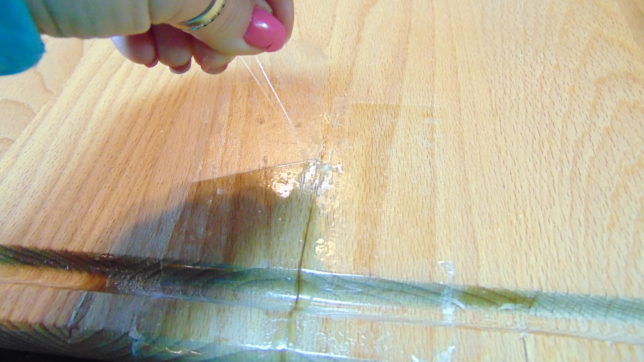
Step 2 – Apply tape to either side of the crack(s). I used clear packing tape but painters tape would work just as well. On the back side of the board, cover the crack completely. This prevents the glue from sliding out the other side.
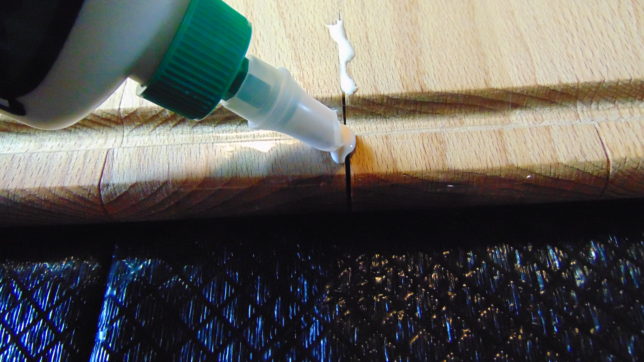
Step 3 – Apply a food-safe glue like Titebond III. It comes in different colors so you can match your board.
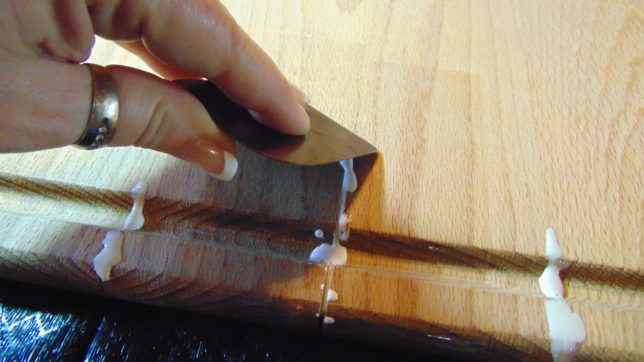
Step 4 – Using a scraper, force the glue into the cracks. I used a stoneware scraper from Pampered Chef. But an old credit card, a sturdy piece of cardboard or even your fingers would work too. Make sure the crack(s) are completely filled.
Step 5 – Clean up the excess glue. This step is essential if you don’t want to spend hours sanding. Simply wipe up the excess with a paper towel and let the glue dry overnight. This will ensure a strong bond that will hold up to sanding.
Step 6 – First, make sure all the cracks are filled. If not, add more glue and allow another day for drying. When you’re ready, remove the tape and scrape away any excess glue.
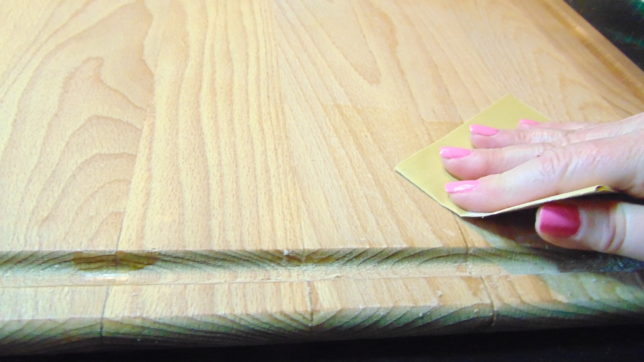
Step 7 – Lightly sand the crack(s) using 220 grit sandpaper. No need to use a lot of force…just enough to smooth everything out. Wash and dry the board thoroughly.
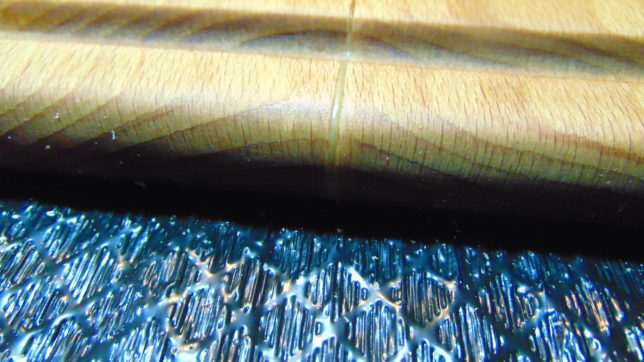
Step 8 – Apply oil as suggested above and allow to air dry.
Looks much better!
A word about maintenance:
A new board should be oiled daily for the first week. After that, oil weekly for one month. Finally, a monthly oil application should keep it in tip-top shape.
Lastly, avoid exposing your wood boards to extreme temperatures. So, next to the stove is not the best place. Your goal is to prevent your boards from drying out too quickly, which leads to cracking. Always give your wood boards some oil anytime they look dry.
Caring for your cutting boards now will save you time later on. It could even save the life of your favorite cutting board. Follow the guidance above and you can enjoy your cutting boards for many, many years.
Do you have a tried and true tip for maintaining your cutting boards? If so, I’d love to hear about it. Just leave a comment below. Oh, and feel free to share this post with someone who needs a little extra help in caring for their own cutting boards.
Until next time,
lisa
Subscribe
If you like what you see, click on the subscribe button so you don’t miss anything!
I promise not to spam you! By clicking the subscribe button, you agree to my privacy policy.


